Installation Tips
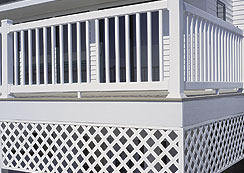
Even beginners will find Veranda Plastic Lattice easy to install. No special tools are required. Just follow these easy tips to install your lattice with ease.
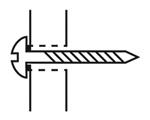
Pre-drill oversized holes. Do not tighten all the way to allow for expansion and contraction.
Along the top, drill and fasten every 24". Drill holes and hang through both molding and panel.
Along the sides and bottom, drill holes and but screws through the molding only.
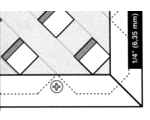
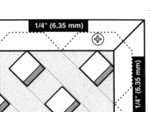
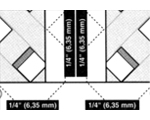
Allow a 1/4" gap on all sides for expansion with cap and divider moldings.
Important Installation Tips
- Under deck, install wooden blocks or stakes as support points if none are available.
- If the lattice bows, loosen attaching screws and make sure you have allowed enough gap for expansion and contraction.
- Use #8 stainless steel sheet metal screws to maintain the beauty of your project.
- Place fasteners 24" apart for best results.
The diagrams and instructions in this brochure are for illustrative purposes only and are not meant to replace a licensed professional. Any construction or use of the product must be in accordance with all local zoning and/or building codes. The consumer assumes all risks and liability associated with the construction or use of this product. The consumer or contractor should take all necessary steps to ensure the safety of everyone involved in the project, including, but not limited to, wearing the appropriate safety equipment. Except as contained in the written limited warranty, Universal Consumer Products, Inc., does not provide any other warranty, either express or implied, and shall not be liable for any damages, including consequential damages.